History of Photography
Below are some of the landmark events in the evolution of photography:
900 - AD Alhazan discovers the camera obscura.
A camera obscura is a darkened room with a small hole or lens at one side through which an image is projected onto the wall opposite the hole. Alhazan studied the camera obscura phenomenon.
1452-1519 - Leonardo Da Vinci.
Da Vinci worked with a camera obscura and was first to notice the similarity between the way a camera obscura worked and the way the human eye functioned.
1500 - The renaissance camera obscura
During the 15th century artists began to see the potential of using the camera obscura as a drawing aid.
1724 - Johann Heinrich Schultz
Schultz discovered that silver salts darkened when exposed to sunlight. Schulze noticed that sunlight turned the substance black. He tested words and shapes cut out of paper but he never made a permanent image.
1826 - Joseph Nicephore Niepce
Niepce developed heliography to create the world's oldest surviving product of a photographic process: a print made from a photoengraved printing plate. He used a primitive camera to produce the oldest surviving photograph of a real-world scene, View from the Window at Le Gras.
1833 - Louis Daguerre discovers an example of a Daguerrotype
Daguerre's used his experiments with chemicals and silver plates to capture what is thought to be the first photograph of a human being: a man having his shoes shined on Paris' Boulevard du Temple.
1840 - Henry Fox Talbot discovers an example of a calotype print
William Henry Fox Talbot invented the negative-positive photographic process using paper first washed in nitrate of silver then with potassium iodide The process is still in use today.
1870 - Richard Leach Maddox discovers the Gelatin dry plate camera
Maddox invented lightweight gelatin negative plates for photography and for the first time, cameras could be made small enough to be hand-held.
1877 - Edwaerd Muybridge Horse
Eadweard Muybridge is best known for his photographic studies of motion of humans and animals using multiple cameras to capture motion.
1885 - George Eastman's rolled film
Eastman created the first roll of film which was a departure from the traditional method of using glass plates and a sink.
1925 - Leica Camera and Oskar Barnak
Barnak is the inventor of the Leica 35mm camera, which became the first commercially successful 35mm still-camera.
1975 - Steve Sasson invents the digital camera
Steven Sasson invented the self-contained digital camera. The resolution was only 0.01 megapixels). The image was recorded onto a cassette tape and this process took 23 seconds.
Camera Obscura
 My camera obscura
Camera obscura is a box that lets light in through a small opening on one side and projects a reversed and image on the other. It is one of the world's oldest types of camera. I made my own camera obscura using the following steps:
When you point the camera at an object, an inverted image is projected onto the tracing paper.
This simple camera obscure has a fixed aperture and focus because it has no moving parts. To adjust the focus, the tracing paper screen would need to be adjusted closer or further away from the lens. To change the aperture, a different magnifying glass would need to be fitted.
- I folded black card into a cube shape. It was done in a way so two opposite sides of the cube were missing.
- Black card was used to ensure that the camera was light tight.
- I then cut and taped a piece of tracing paper over one of the missing sides.
- I then cut out a round hole in the centre of the sheet of black sugar paper and taped it to the remaining open face of the cube.
- The magnifying glass was used as a simple lens. It was carefully taped over the hole.
When you point the camera at an object, an inverted image is projected onto the tracing paper.
This simple camera obscure has a fixed aperture and focus because it has no moving parts. To adjust the focus, the tracing paper screen would need to be adjusted closer or further away from the lens. To change the aperture, a different magnifying glass would need to be fitted.
DSLR
 DSLR front
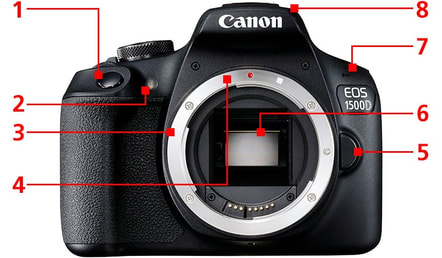
DSLR cameras are the most popular camera choice. They are used with interchangeable lenses. DSLR stands for Digital Single Lens Reflex.
These are the controls on a DSLR camera:
1. Shutter: press the button to take the picture.
2. Red flash: to release any red eye.
3. Lens mount: to fit the lens on the camera.
4. Lens flex: to help show where to attach the lens.
5. Lens release button: press this button to detach the lens.
6. Mirror: reflects the image upwards.
7. Microphone: records sound when the camera is filming.
8. Flash: to light up dark and dull areas of the picture.
 DSLR rear
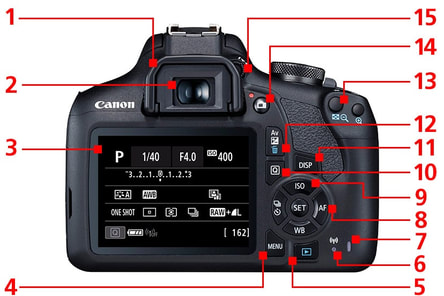
1. Eye cup: prevents external light coming through to your eye.
2. Viewfinder eyepiece: to view what's being photographed.
3. LCD monitor: gives info about the camera settings.
4. Menu button: allows you to change the camera settings.
5. Playback button: lets you view pictures you have taken.
6. WI-FI lamp: lets you know if you have WI-FI.
7. Access lamp: lights up when writing info to the memory card.
8. Set button: lets you move between menu items.
9. ISO speed setting button: allows you to adjust the sensitivity of the camera sensor.
10. Quick control button: allows the the camera to go to quick control.
11. Display button: allows you to toggle between different information.
12. Erase button: use this button to delete unwanted images.
13. Focus point selection button: to set area in focus when using auto focus.
14. Live view shooting: press to toggle to live view display.
15. Dioptric adjustment knob: to adjust the view finder focus.
Shutter Speed
Shutter speed is the amount of time that the camera's shutter is open. The longer the shutter is open, the more light passes through to the camera's sensor. Shutter speed is commonly measured in fractions of a second. A fast shutter speed will freeze the motion of a moving object. A slow shutter speed will blurring any object moving while the shutter is open.
Examples
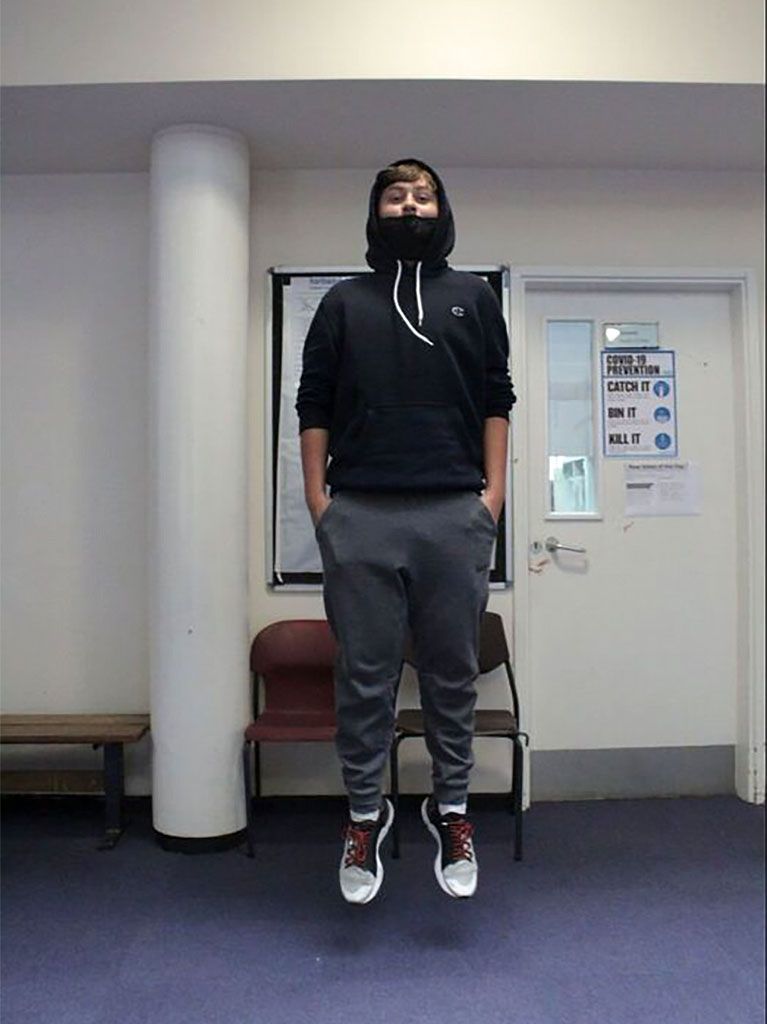
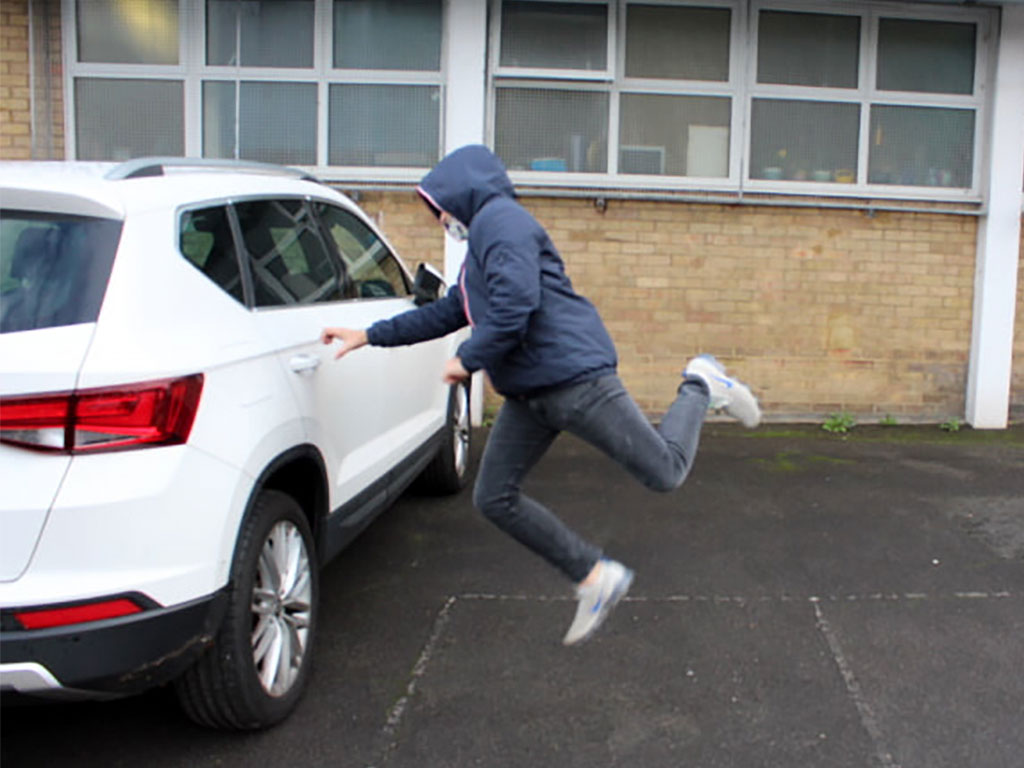
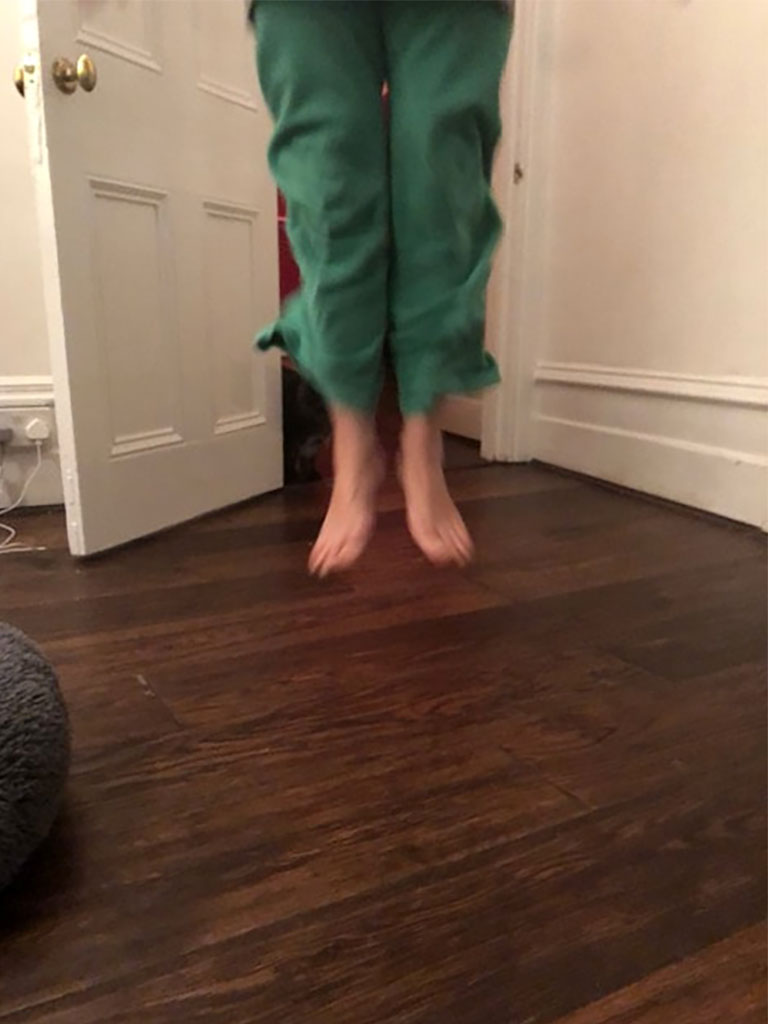
I first took a photo at a 200th of a second. This is a fast shutter speed and I was able to captured the jumping person while he was in the air. The photo is darker because the fast shutter speed means less light is being captured by the sensor.
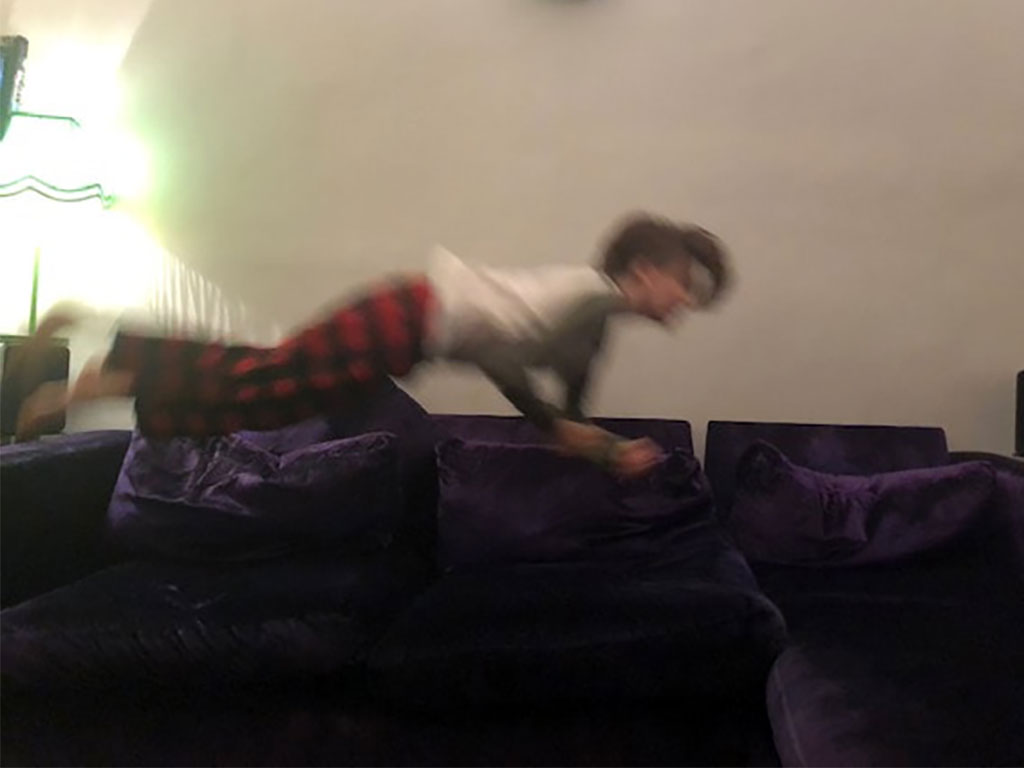
I then took a picture with the shutter speed of a second. This picture is quite blurry because the camera captured his movement in the frame. The photo is brighter because the shutter is open longer allowing the sensor to capture more light.
Sometimes when a picture turns out very white, it means it is over exposed. A picture that is too dark is under exposed.
Examples
I first took a photo at a 200th of a second. This is a fast shutter speed and I was able to captured the jumping person while he was in the air. The photo is darker because the fast shutter speed means less light is being captured by the sensor.
I then took a picture with the shutter speed of a second. This picture is quite blurry because the camera captured his movement in the frame. The photo is brighter because the shutter is open longer allowing the sensor to capture more light.
Sometimes when a picture turns out very white, it means it is over exposed. A picture that is too dark is under exposed.
Jumping. 1/200 second shutter speed
|
Jumping. 1 second shutter speed
|
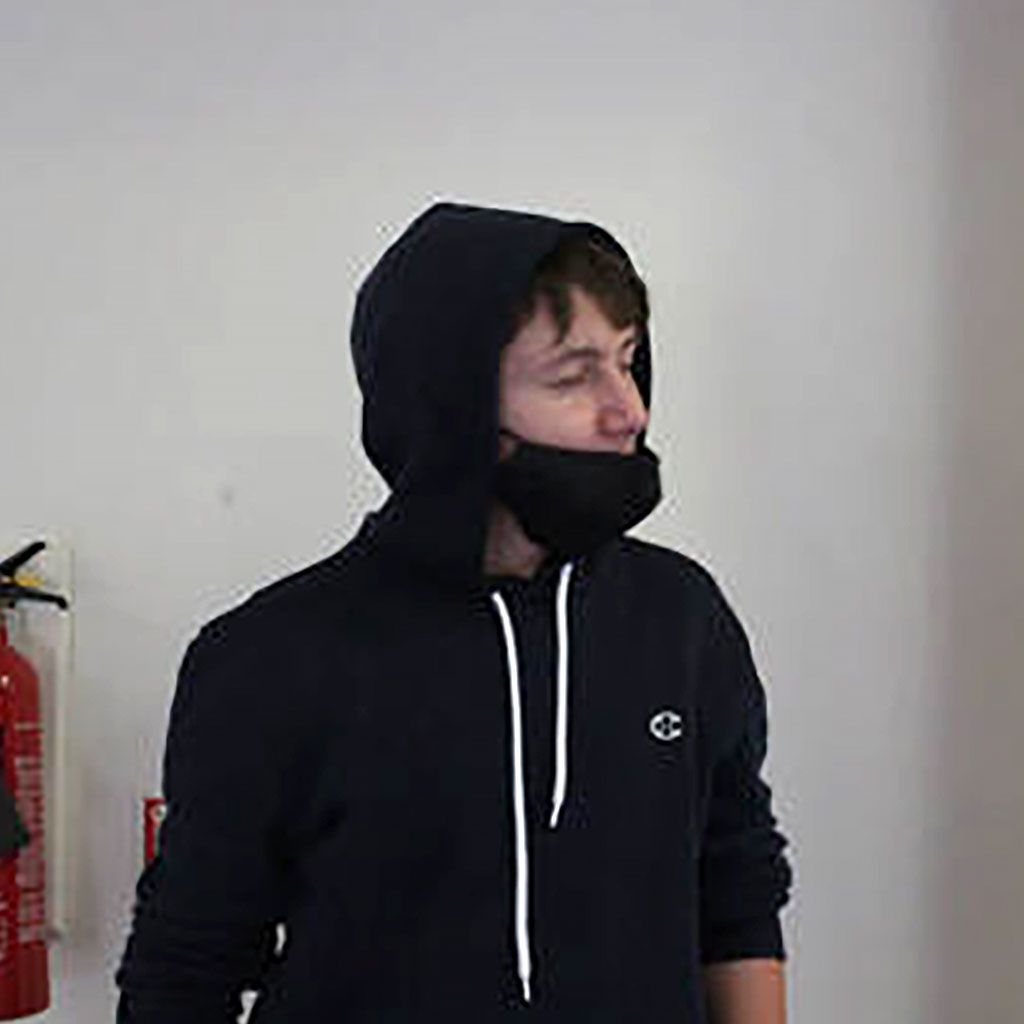
Head shaking. 1/200 second shutter speed
|
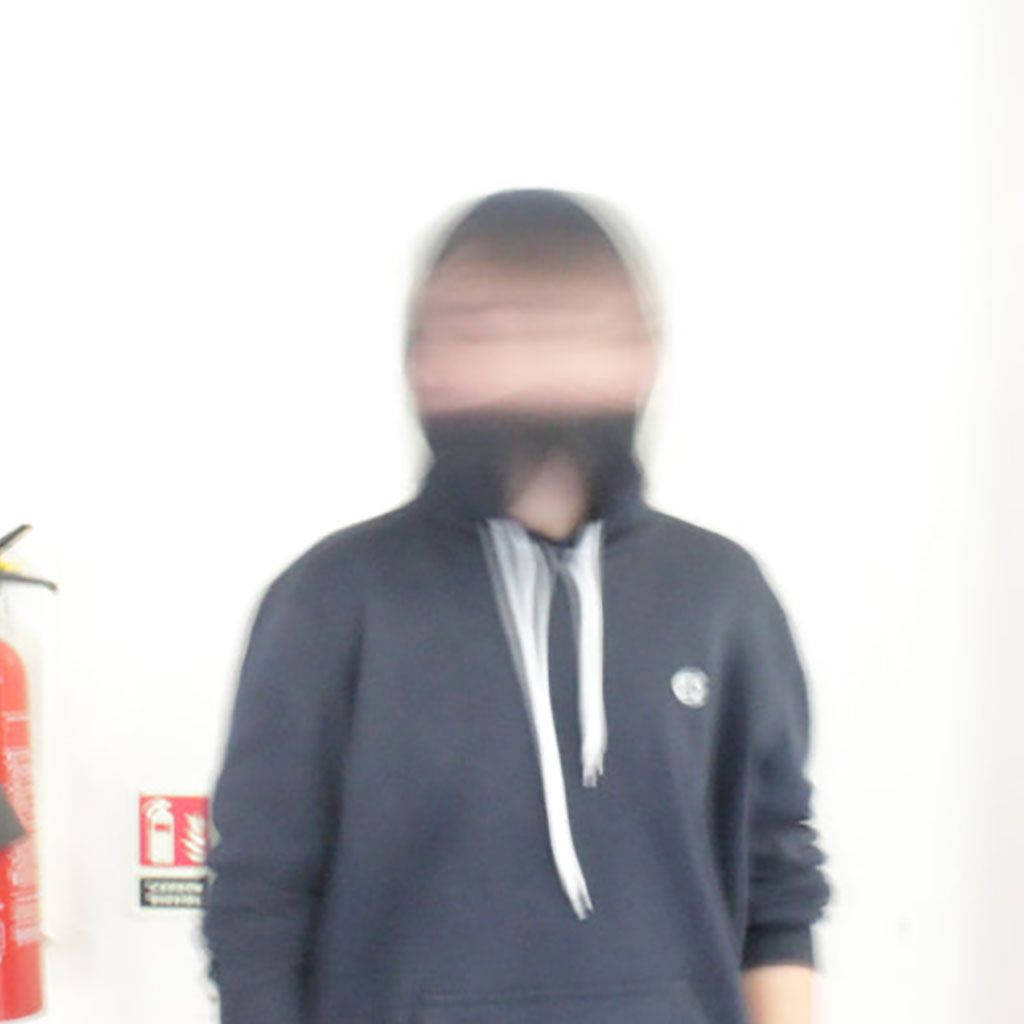
Head shaking. 1 second shutter speed
|
Natsumi Hayashi
|
Analysis
Natsumi Hayashi is a Japanese photographer that takes photos of people levitating while doing everyday tasks. Natsumi would make people look like they are levitating by capturing them in the air while jumping. To do this she would be using a fast shutter speed of around 1/300 second. |
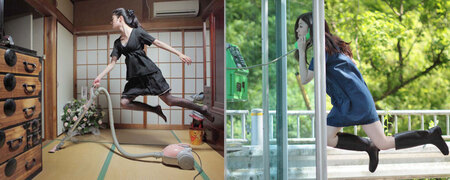
Examples of Natsumi Hayashi's work
|
Response
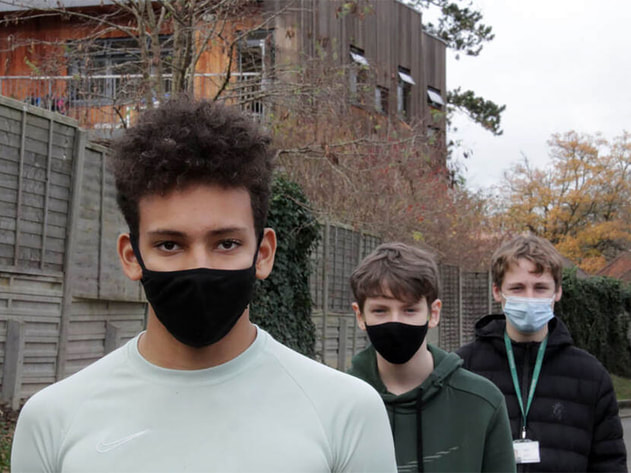
I made two series of images trying to capture people in the air. The first set of images were made in the grounds of my school. I think that these images worked quite well and look similar to the work of Natsumi Hayashi. This is because the photos were made during the day in bright light so I was able to use a fast shutter speed to freeze the motion without the pictures being too dark.
I made two series of images trying to capture people in the air. The first set of images were made in the grounds of my school. I think that these images worked quite well and look similar to the work of Natsumi Hayashi. This is because the photos were made during the day in bright light so I was able to use a fast shutter speed to freeze the motion without the pictures being too dark.
A photo similar to Hayashi's vacuum cleaner image

Here I tried to make a picture relatable to Hayashi's photo of a woman jumping out of a train.

A person jumping towards the camera about to punch it in the lens.
The second set of images were made at home at night. This set of pictures did not work as well because I shot them using my smartphone. It was too dark to be able to freeze the motion in the photos and I am not able to control the shutter speed of the camera on my phone. The pictures are all blurry. If I were do try this again I would shoot the pictures using a DSLR during the day when it is bright.

|
|

|
|
Francesca Woodman
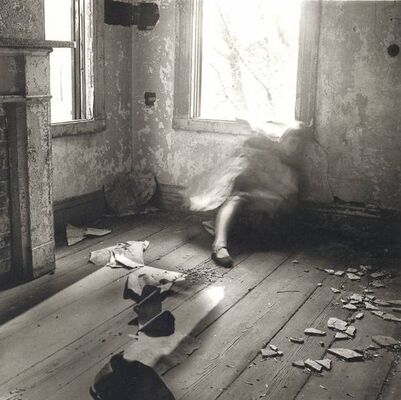 House #3, Providence, Rhode Island, by Francesca Woodman
Analysis
Francesca Woodman intended to make her photos look death-like and ghostly. She did this by using a long shutter speed and double exposures. The use of high contrast give deep shadows and shooting in black and white makes the image more mysterious. She wanted inspire the viewer to think about wider issues such as gender, sexuality and self, resisting the male gaze, feminism, corruption and social injustice, representations of the body and death.
Woodman is considering ways in which women can reject the male gaze. The blurred image creates a sense of movement and urgency. You can see that this is a portrait of a woman by her shoes and feminine shape. However the areas of a woman's body that men gaze at have been blurred by her movement. The blurred image creates a sense of movement and urgency. You can see that this is a portrait of a woman by her shoes and feminine shape. However the areas of a woman's body that men gaze at have been blurred by her movement. She wanted to explore ways of expressing her own disturbed psychological state.
Woodman used a long shutter speed in the photograph. The long shutter speed helped her to create the effect of movement. This helps to support her intention to hide from a man's gaze by camouflaging herself into the background.
Response
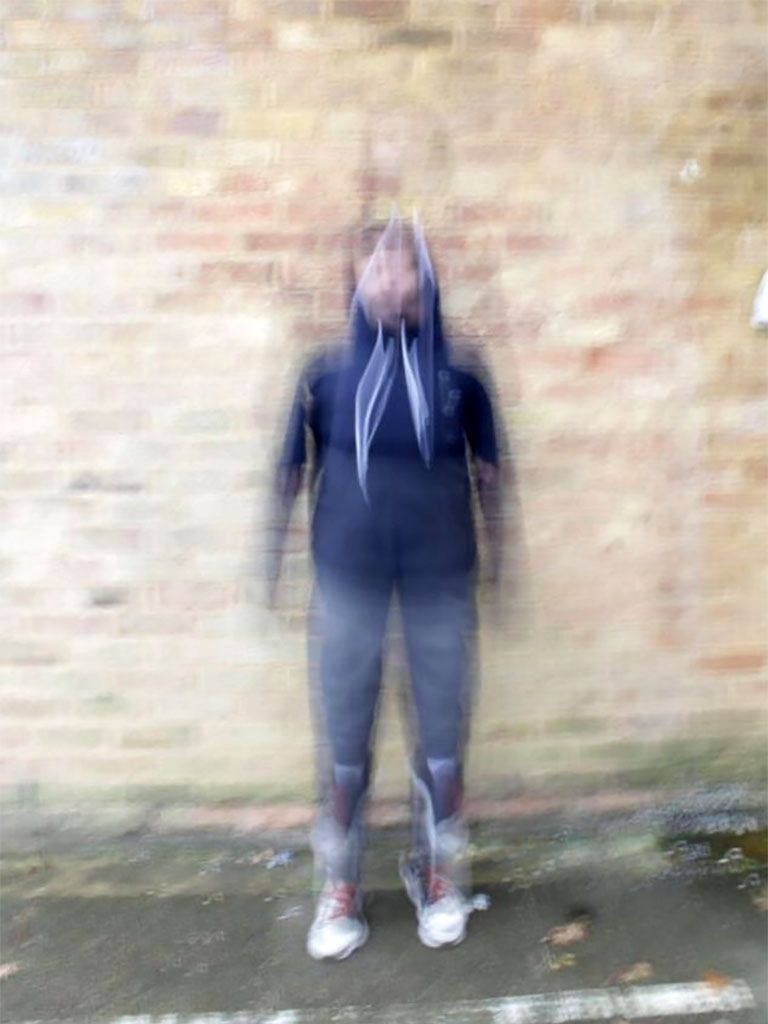
I made a series of black and white images in the style of Francesca Woodman. I used a long shutter speed to deliberately blur any movement that took place during the exposure. Some of the images have a sharp background and the person in them is blurred because they have walked through the frame. Some of the images also have a blurry background because I was not able to keep the camera still during the length of the exposure. Even though this was a mistake, I really like the effect it gives and I think it helps make the images look more mysterious.
Francesca Woodman intended to make her photos look death-like and ghostly. She did this by using a long shutter speed and double exposures. The use of high contrast give deep shadows and shooting in black and white makes the image more mysterious. She wanted inspire the viewer to think about wider issues such as gender, sexuality and self, resisting the male gaze, feminism, corruption and social injustice, representations of the body and death.
Woodman is considering ways in which women can reject the male gaze. The blurred image creates a sense of movement and urgency. You can see that this is a portrait of a woman by her shoes and feminine shape. However the areas of a woman's body that men gaze at have been blurred by her movement. The blurred image creates a sense of movement and urgency. You can see that this is a portrait of a woman by her shoes and feminine shape. However the areas of a woman's body that men gaze at have been blurred by her movement. She wanted to explore ways of expressing her own disturbed psychological state.
Woodman used a long shutter speed in the photograph. The long shutter speed helped her to create the effect of movement. This helps to support her intention to hide from a man's gaze by camouflaging herself into the background.
Response
I made a series of black and white images in the style of Francesca Woodman. I used a long shutter speed to deliberately blur any movement that took place during the exposure. Some of the images have a sharp background and the person in them is blurred because they have walked through the frame. Some of the images also have a blurry background because I was not able to keep the camera still during the length of the exposure. Even though this was a mistake, I really like the effect it gives and I think it helps make the images look more mysterious.


Aperture
Aperture is the size of the hole the photographer sets in the to allow light onto the sensor. Aperture is also know as f-stop. A low f-stop means the aperture is wider, allowing more light in. A high aperture means the aperture is smaller and allow less light in. The aperture can be changed to adjust how much of the picture is in focus. The higher the aperture the less of the picture will be in focus.
Depth of field is the distance between the closest and the furthest object that will be in focus. A shallow depth of field will be a result of a high aperture. This is good for portraits where you can make the person stand out more by making the background out of focus. A deep depth of field will be a result of a low aperture. This is good for landscape where you cam make all of the photo in focus.
Examples
Below are some examples of different aperture settings. The show the effect on the depth of field when using high and low apertures.
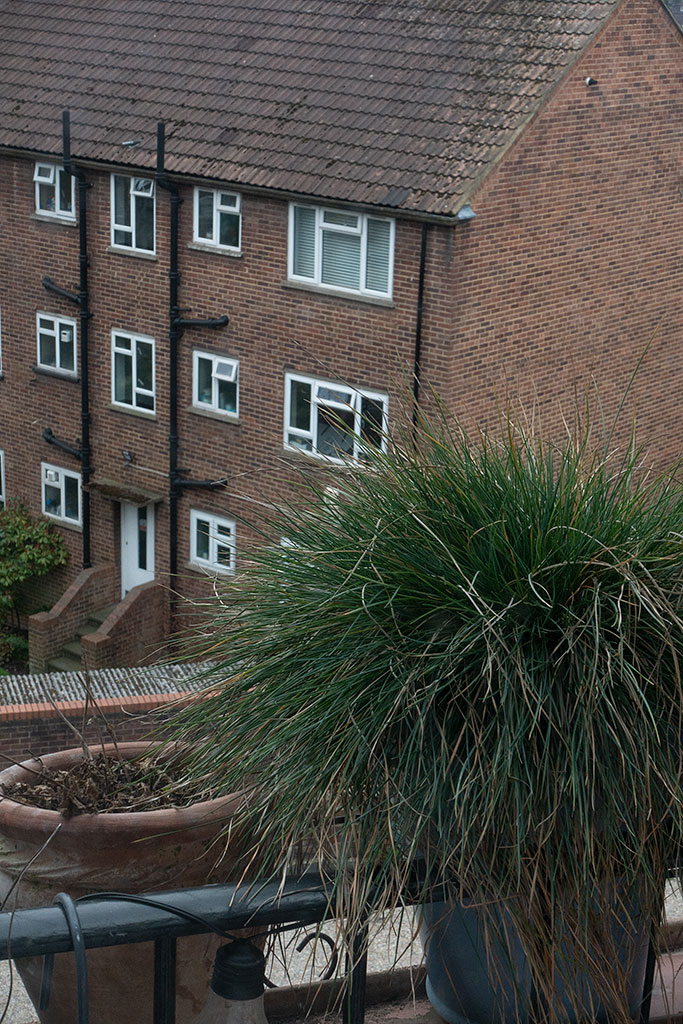
Taken with a high aperture making the background look blurry.
|
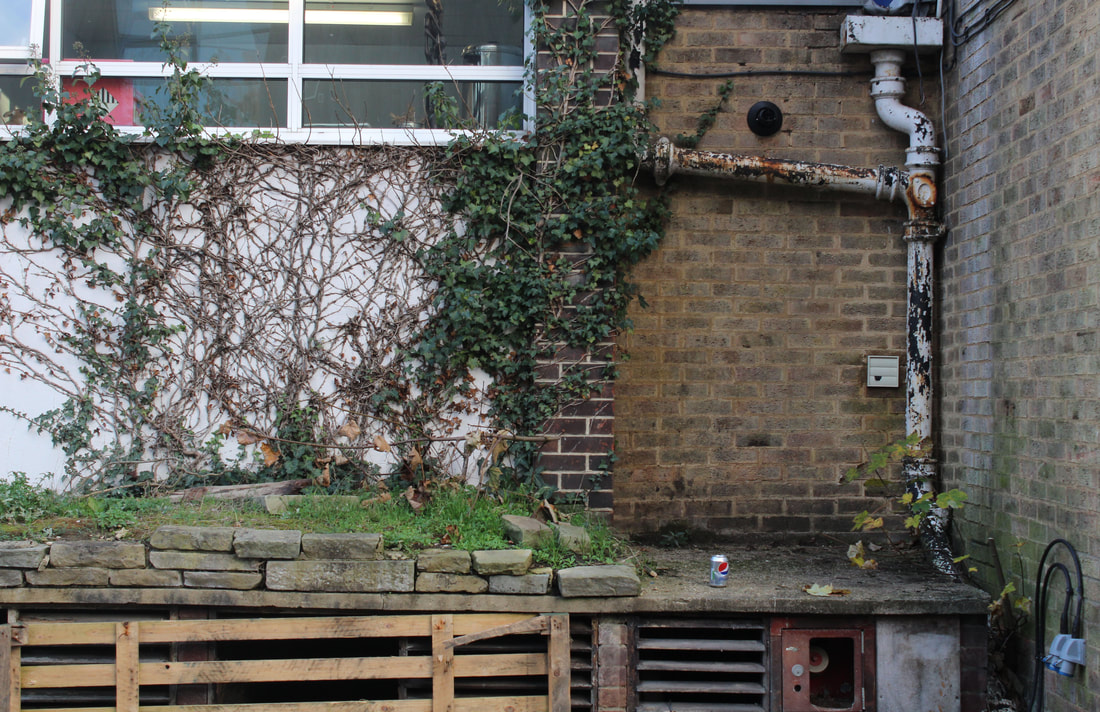
Taken with a lower aperture and the background is less blurry.
|

Shallow depth of field because of high aperture
|
Deep depth of field because of high aperture
|
Composition
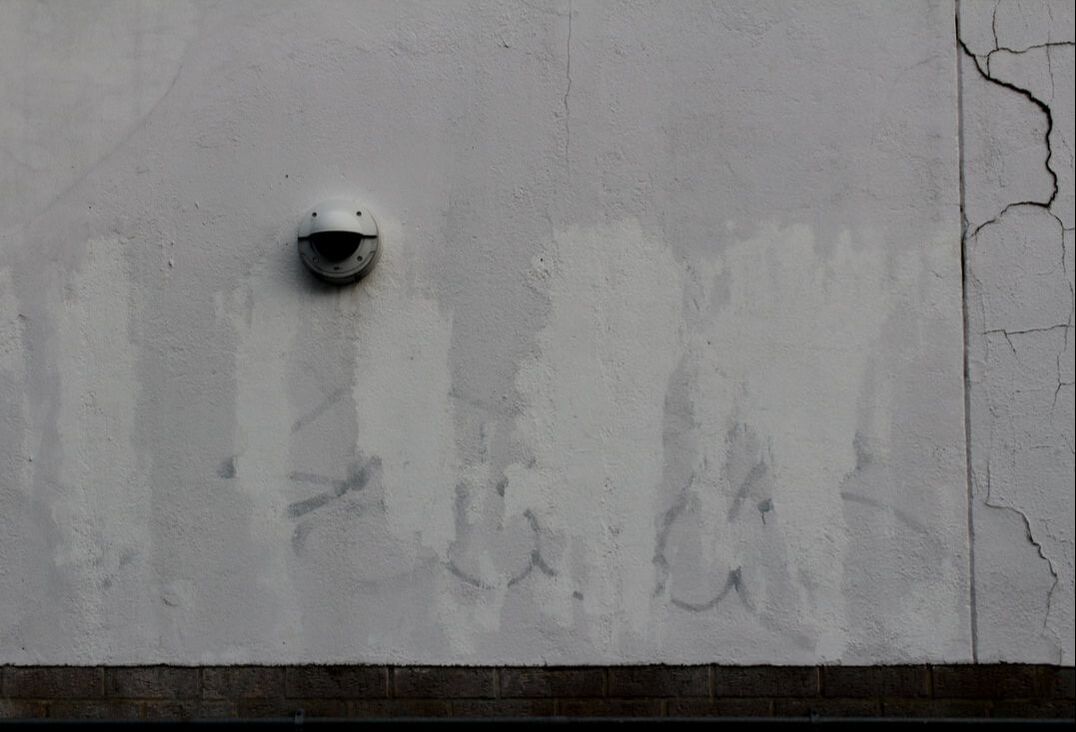
Composition refers to the arrangement of the objects in the frame. A good composition will make the image more pleasing. Thinking about where the objects in the photo are placed is very important. Below are some photos I made in black and white. I tried to make simple compositions using strong shapes.


Rule of Thirds
The rule of thirds is a way framing the composition so it is divided into three sections across the horizontal and vertical lines. Placing objects on these imaginary lines makes it easier to create good compositions. The object being photographed can be along any of the lines, but is often best placed where two of the lines cross. Most modern cameras will allow you to add a grid over the viewfinder to help with composition.
Below are some pictures I took using the rule of thirds to make the compositions.
Below are some pictures I took using the rule of thirds to make the compositions.


GIFS
Animated GIFs are a series multiple images that are played back in sequence when the file is opened or displayed in a web browser. The result is an animated clip or a short movie. I made my own GIFs using Photoshop.
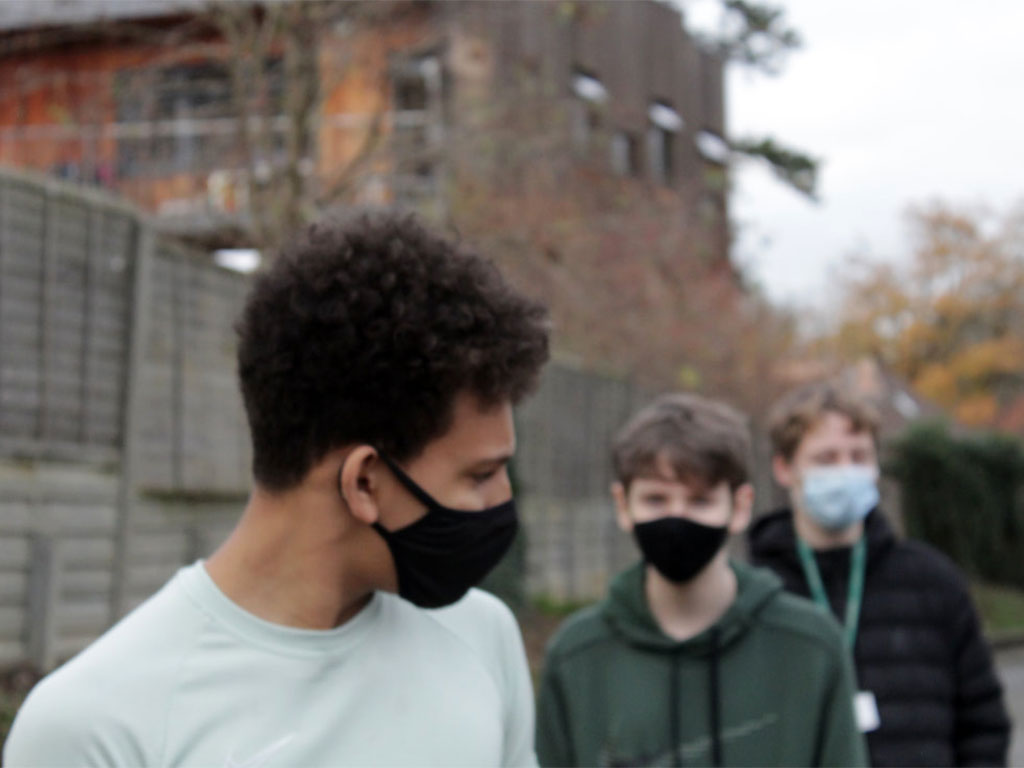
My first GIFs was made by taking some photos of a classmate. In each photo he moved his head a bit more from left to right. I then uploaded them into Photoshop's animation tool. I put them in order and then I experimented with how long each frame should display before moving onto the next one. Below are photos I used to make my first GIF.
My first GIFs was made by taking some photos of a classmate. In each photo he moved his head a bit more from left to right. I then uploaded them into Photoshop's animation tool. I put them in order and then I experimented with how long each frame should display before moving onto the next one. Below are photos I used to make my first GIF.


Here is the GIF that I made
What Went Well
I think that the GIF went well for my first try. I think it works because my classmate stood very still and I took the photos in the same place so only his head looks like it's moving.
Even Better If
The GIF isn't very smooth. I think it could of been better if I used more photos and made the frame rate faster. This would have it smoother and clearer.
I like the GIFs made by Romain Laurent. His GIFs are funny and creative showing things that you won't see in everyday life.


I made another GIF of my Dad at home. I used a higher number of photos and made the frame rate faster. I think this GIF is better than the first one I made at school.

